To connect SmartLead.ai with SkySenders.ai, you must first generate or retrieve an API key. This key enables secure communication between both platforms.
🛠 Procedure
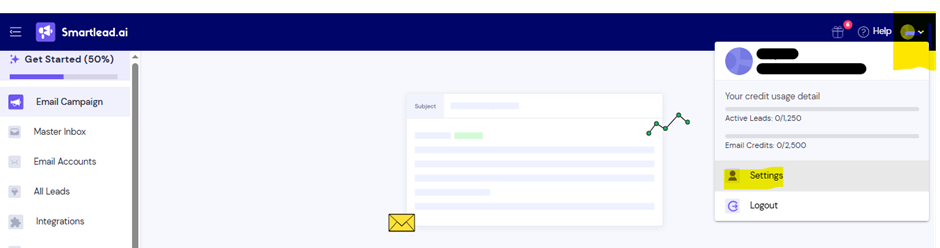
Log in to your SmartLead.ai account.
Click on the profile icon located at the top-right corner of the dashboard.
Navigate to the Settings menu.
Locate the API Key section:
You can either copy an existing key or generate a new one.
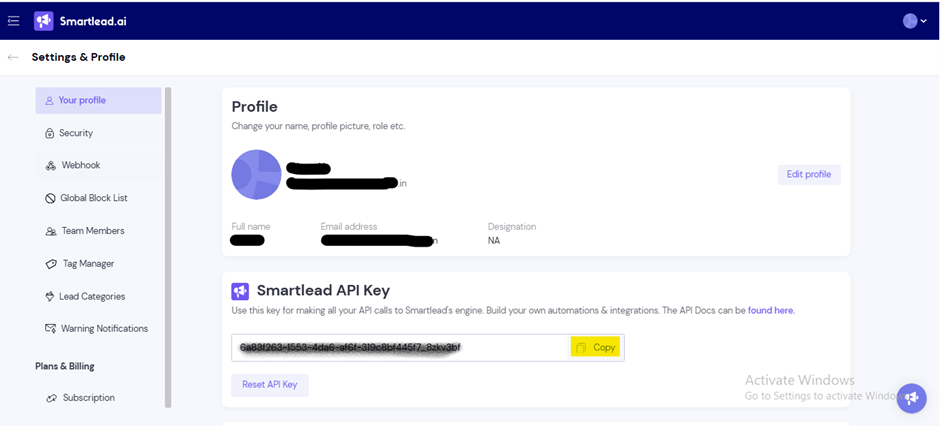
Use this API key to connect with SkySenders.ai.
⚠ Notes/Tips: Never share your API key. It serves as a secure identifier for your account—like a username and password combined.
📄 Description
Integrating the API key in SkySenders.ai allows you to push mailboxes to SmartLead.ai directly from your dashboard.
🛠 Procedure
Log in to your SkySenders.ai account.
Click on “Settings” (bottom-left of the dashboard).
Navigate to the Integration section.
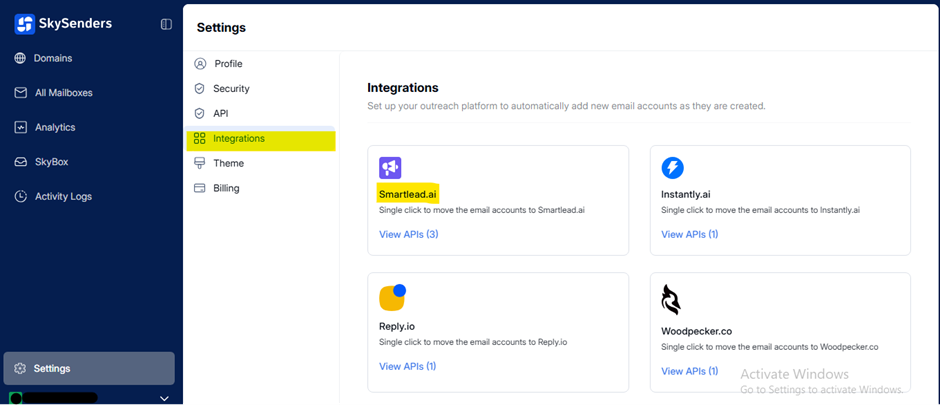
Choose SmartLead.ai from the available integration options.
View all connected API keys. To add a new one, click “Add New API Key”.
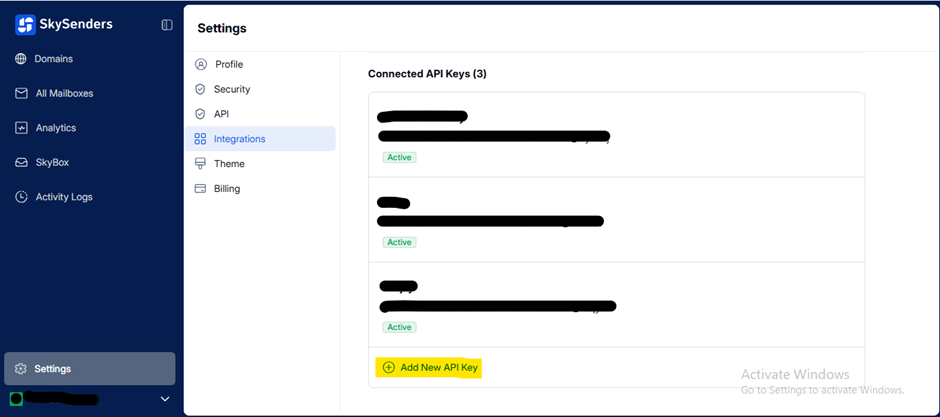
Fill in the required fields:
API Key Name
API Key (copied from SmartLead.ai)
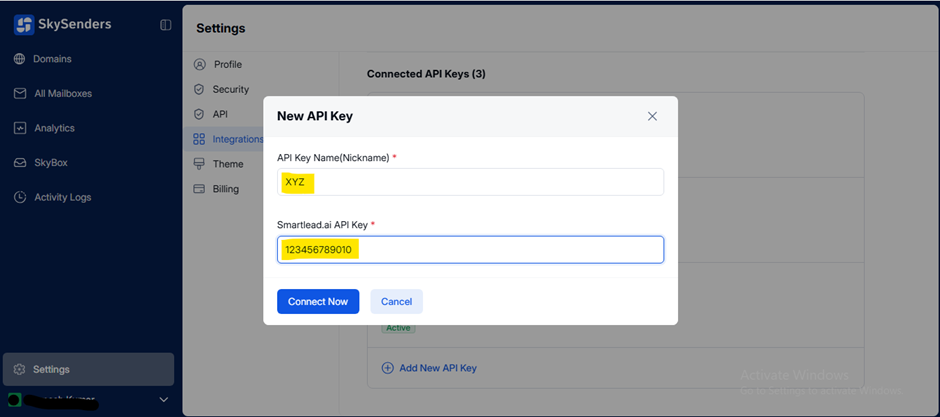
Click “Connect Now” to complete the integration.
✅ Notes/Tips: Ensure the API key is accurate to avoid connectivity errors.
📄 Description
Once the API key is connected, you can push your selected mailboxes to SmartLead.ai for outreach operations.
🛠 Procedure
Go to the SkySenders App.
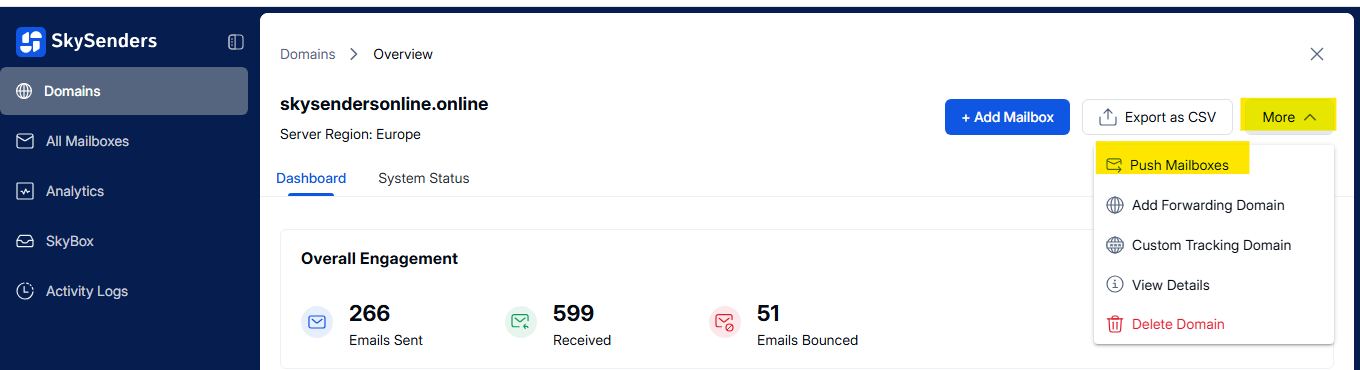
Click on “Domain” from the top-left menu.
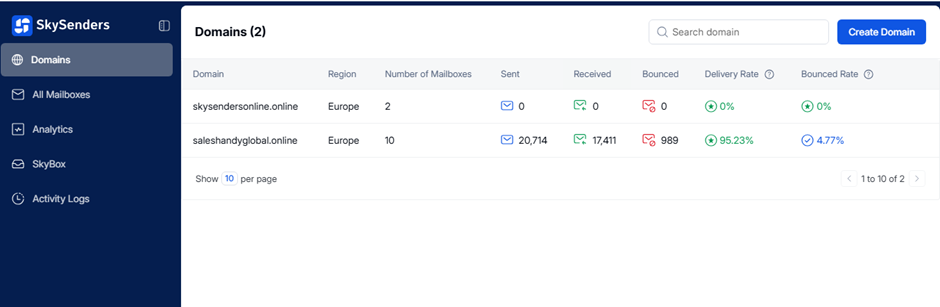
All your purchased domains will be listed.
From the list, choose the domain where the mailboxes are located.
Click on “More” from the top-right menu.
Click on “Push Mailboxes”
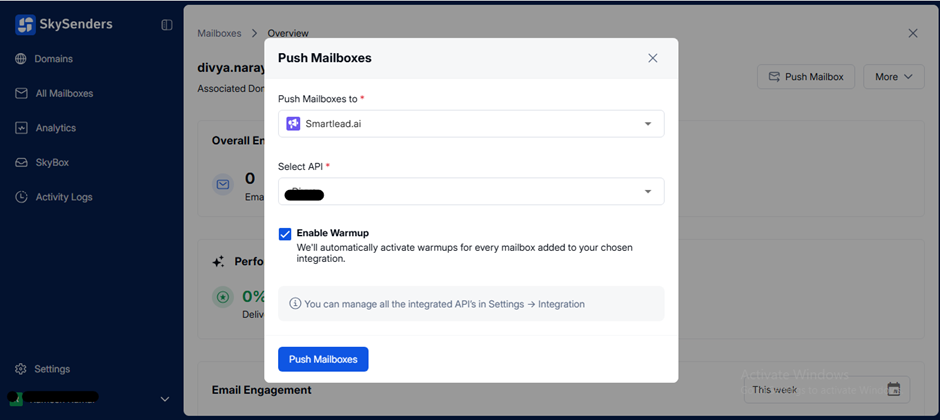
Choose SmartLead.ai from the drop-down menu.
Select the appropriate API Key from the list.
Enable the Warm-up option if required.
Click “Push Mailboxes” to complete the transfer.
✅ Notes/Tips: Always verify mailbox details before pushing to avoid errors during the transfer process.
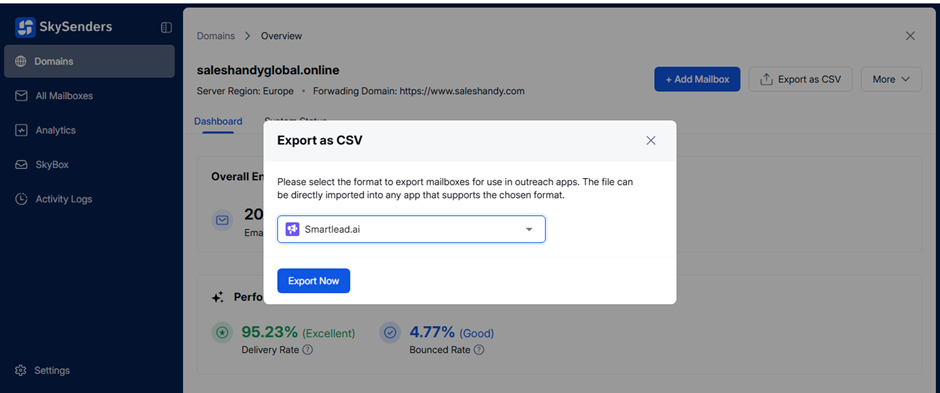
Go to the SkySenders App.
Click on Domain from the top left.
All purchased domains will be displayed.
Select the domain you wish to export data from.
Click Export CSV from the top right.
Choose the format to export mailboxes for outreach apps.
Click Export Now.
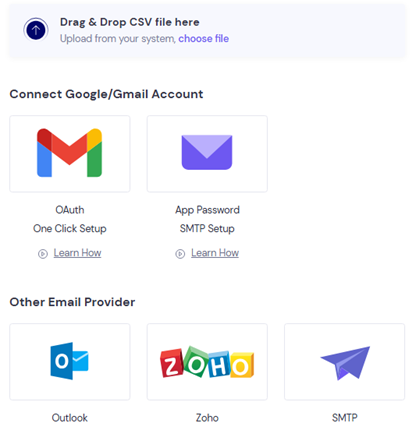
Login to Smartlead.ai.
Click Add Account(s).
Select Connect Your Email Account.
Click “Choose File” to view the required CSV format.
Here’s the link (Refer to the sample CSV to confirm details are correctly formatted)
Upload the CSV file.
Preview for validation. The system will flag:
High warmup numbers
Missing passwords
Fix errors, skip invalid entries, or re-upload.
Monitor live status of mailbox additions.
You will receive an email with upload status details and a summary link.
📘 [Step-by-step guide to bulk email addition in SmartLead.ai] (Here is the link)
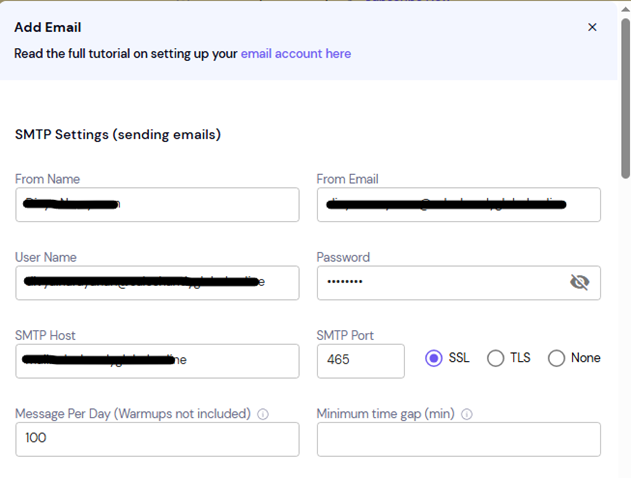
Manually configure and add mailboxes using SMTP & IMAP settings in SmartLead.ai.
Log in to SmartLead.ai.
Click Add Account(s).
Select Connect Your Email Account.
Choose SMTP from the connection options.
Fill in the SMTP and IMAP server settings.
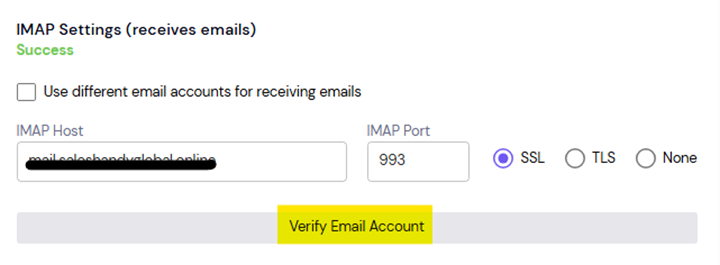
Click Verify Email Account and Save.
On success, a confirmation message will be shown.
Some outreach platforms may flag duplicate mailbox pushes. Ensure mailbox activity before proceeding.
Review the mailbox integration status from the SmartLead.ai dashboard.
Log in to the SmartLead.ai Dashboard.
Click on Email Account from the left-hand side.
If successful, mailbox details will appear.
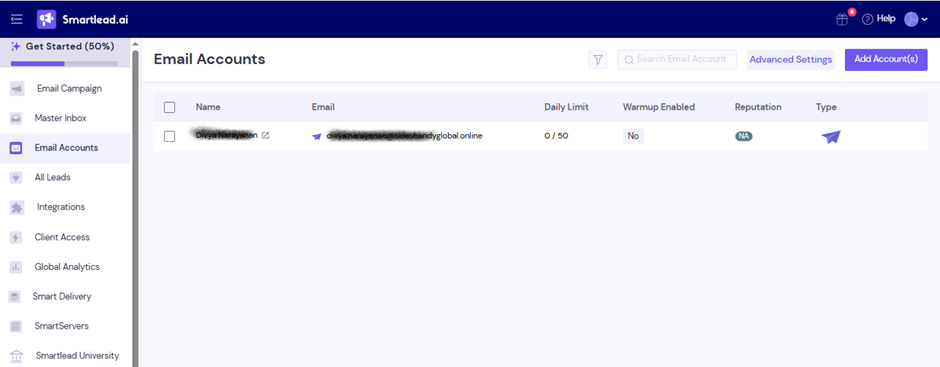
If the push failed, mailbox info will be missing.
