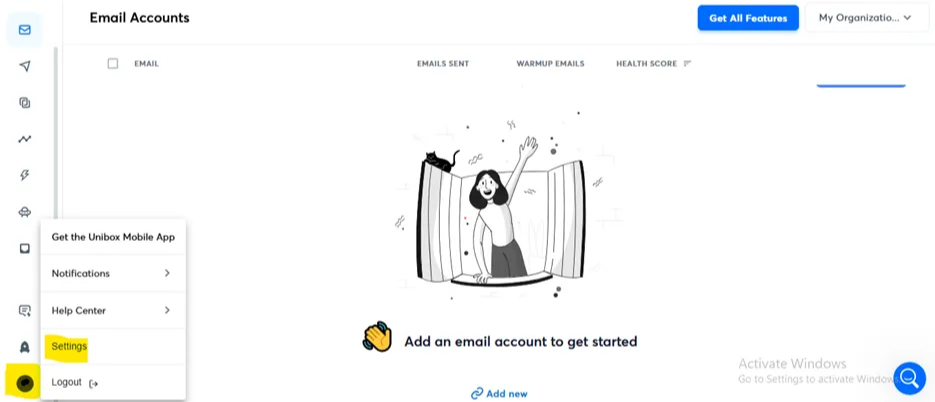
Login to Instantly.ai.
Click the profile icon at the bottom-left of the dashboard.
Navigate to Settings.
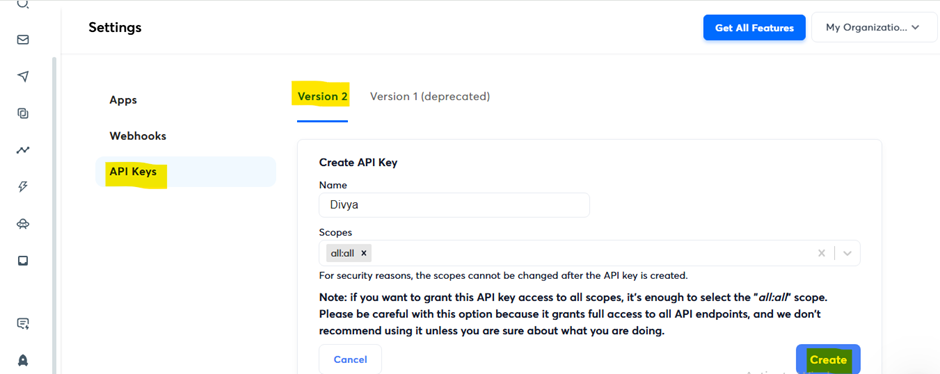
Go to Integrations > API Keys > Version 2.
View or generate new API keys.
Click Create API Key, enter necessary details, and confirm.
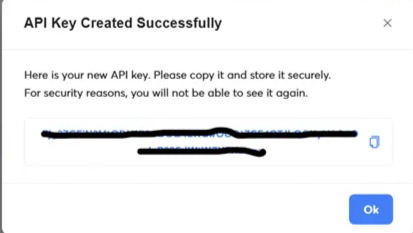
Copy and store the API key securely — it won't be shown again.
Use this key to authenticate requests from SkySenders.
Do not share your API key; it acts as your identity on the platform.
Connect Instantly.ai to SkySenders using the API key to enable mailbox transfer.
Login to SkySenders.ai.
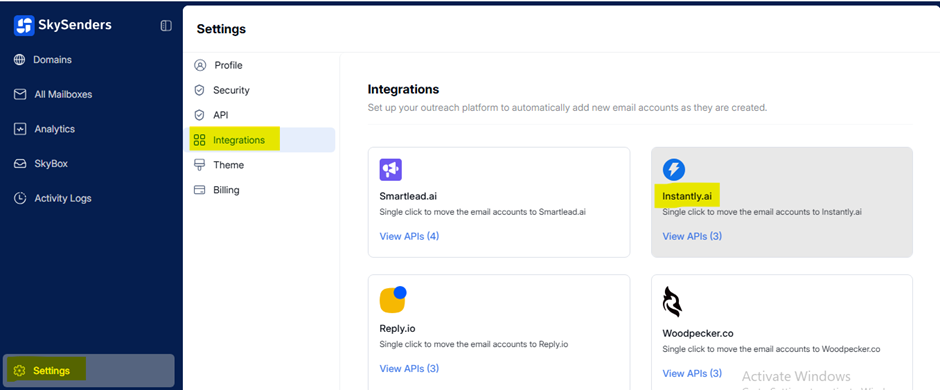
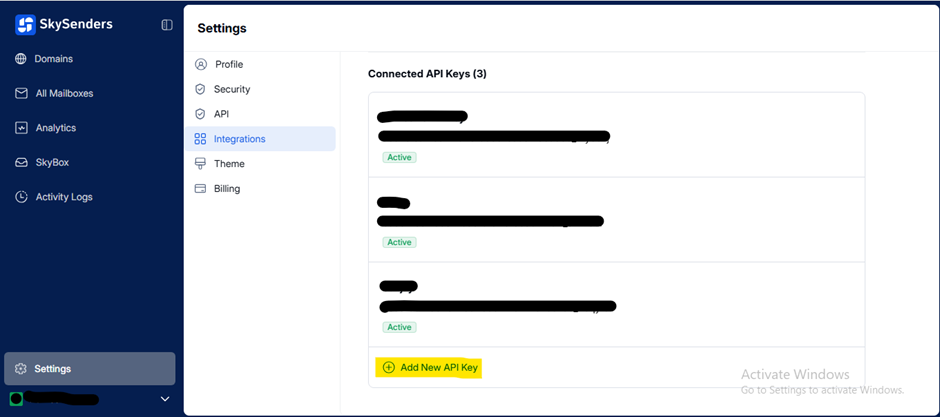
Go to Settings at the bottom left of the dashboard.

Navigate to the Integration section.
Select Instantly.ai from integration options.
To add new key, click Add New API Key.
Enter the API Key Name and the API Key.
Click Connect Now.
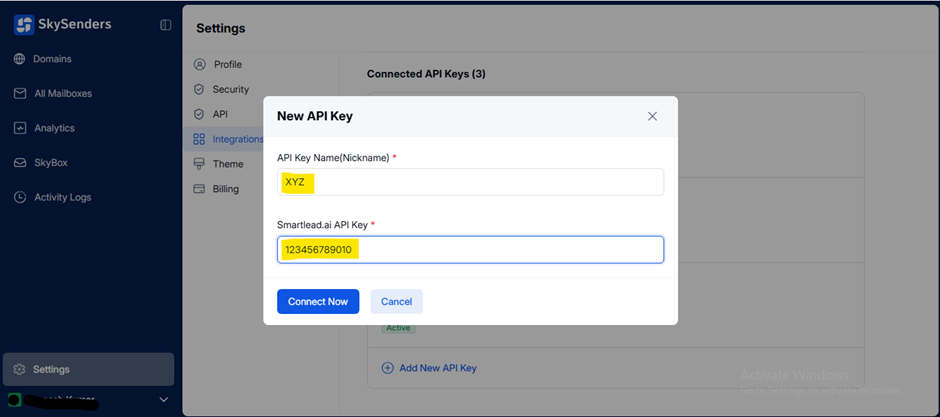
Double-check API key accuracy to prevent integration errors.
Transfer mailbox details from SkySenders to Instantly using the API integration.
Go to All Mailbox in your SkySenders dashboard.
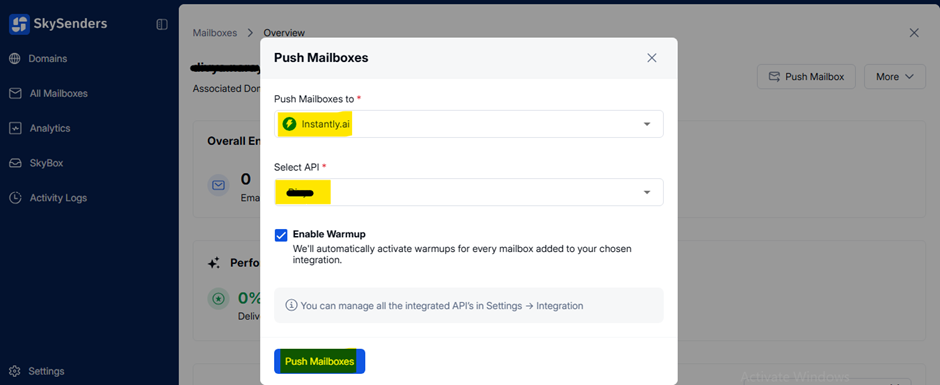
Select the mailbox you want to push.
Click Push Mailbox (top right).

Choose Instantly.ai from the dropdown.
Select the appropriate API Key.
Optionally, enable the Warm-up feature.
Click Push Mailboxes.
Ensure mailbox details are accurate before pushing to avoid transfer issues.
Export mailbox data as a CSV file to import into Instantly.ai manually.
Login to SkySenders.
Click on Domain (top left).
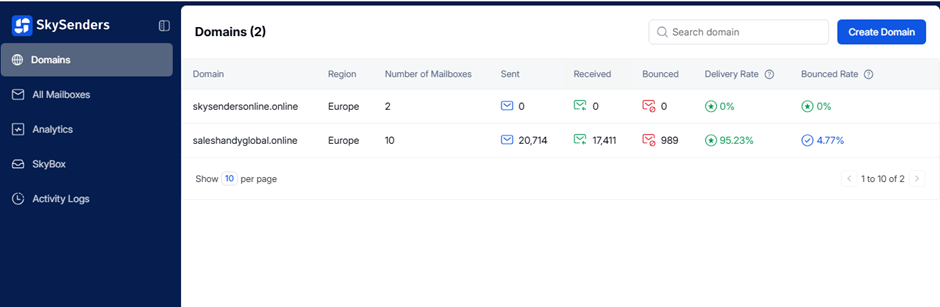
Select the domain you want to export from.
Click Export CSV (top right).
Select Instantly.ai format.
Click Export Now.
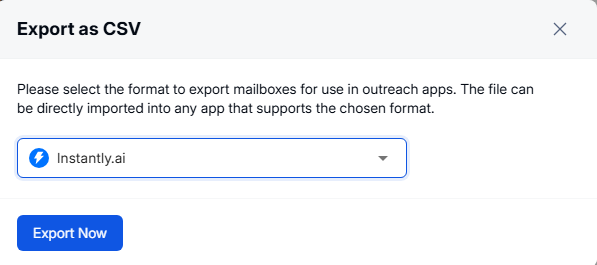
The CSV file will download automatically.
Confirm file contains all necessary mailbox fields.
Use the downloaded CSV file to bulk import mailboxes into Instantly.ai.
Login to Instantly.ai.
Click the profile icon (bottom left).
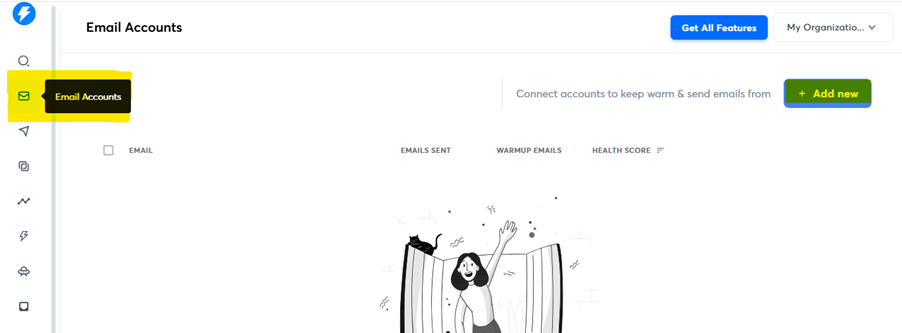
Navigate to Email Account.

Click Add New (top right).
Select Any Provider > Import from CSV.
Choose and upload your CSV file.

If successful, mailbox details will appear in the Mailboxes list.
Only available on Hypergrowth plan or above.
Manually configure mailboxes using IMAP/SMTP credentials.
Login to Instantly.ai.
Click the profile icon (bottom left).
Go to Email Account.
Click Add New.
Select IMAP/SMTP at bottom right.
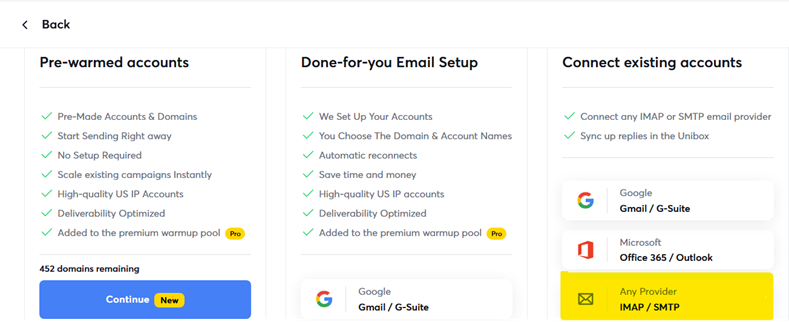
Choose Any Provider or Single Account.

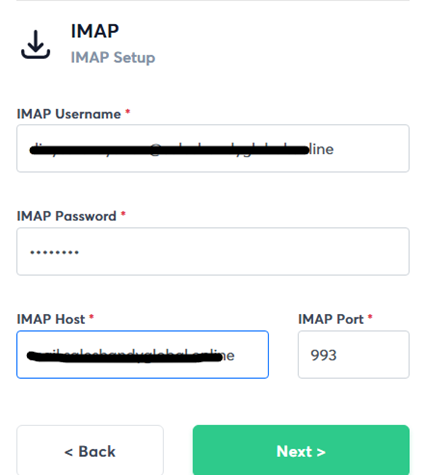
Enter email account details.
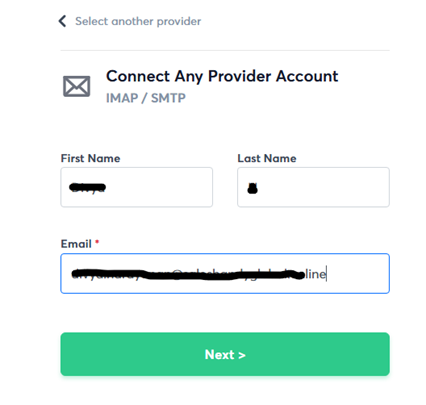
Fill IMAP Server Data, click Next.
Fill SMTP Server Data, click Next.
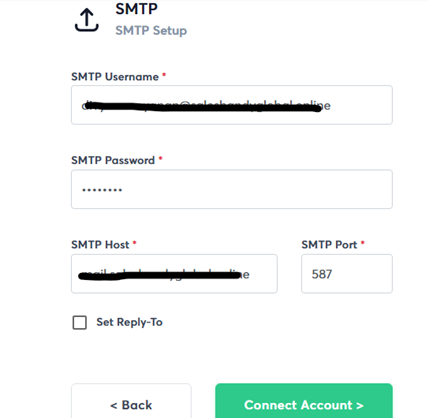
Click Connect Account.
Ensure correct server settings to prevent connection issues.
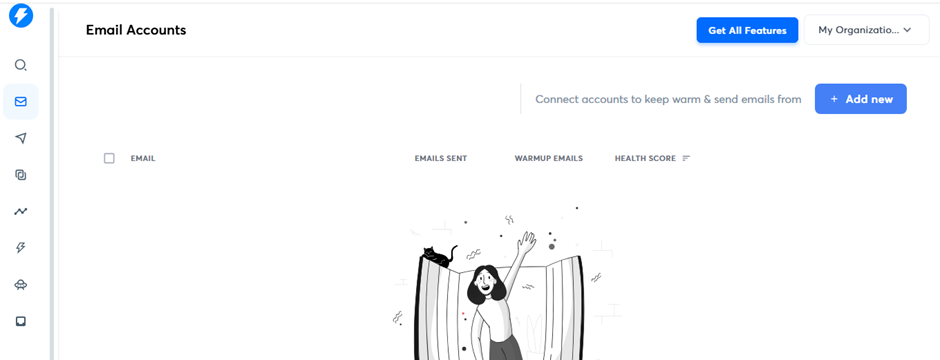
Review the status of mailbox connections from the Instantly.ai dashboard.
Login to Instantly.ai.
Navigate to Email Account (left sidebar).
Successfully pushed mailboxes will be listed here.
Failed mailbox pushes will not appear.
User need to be on the Hypergrowth plan (or above) to be able to access the API key and Import from CSV.
