Create or retrieve your API key from Reply.io to integrate with SkySenders.ai.
🛠 Procedure:
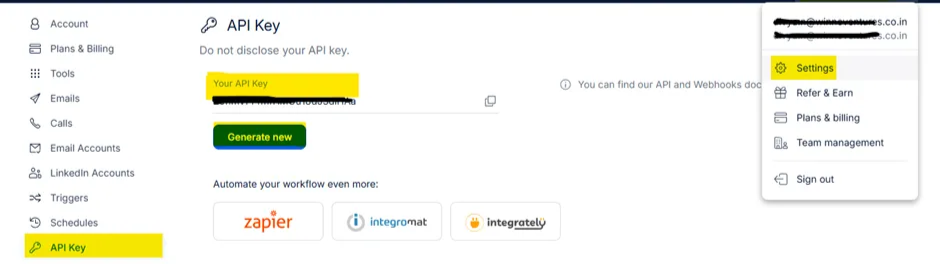
Login to the Reply.io application.
Click the Profile icon (top-right).
Go to the Settings menu.
Select API Keys from the left menu.
Copy an existing key or generate a new API key.
💡 Notes/Tips:
Do not share your API key. It functions like a username & password.
🛠 Procedure:
Login to SkySenders.ai.
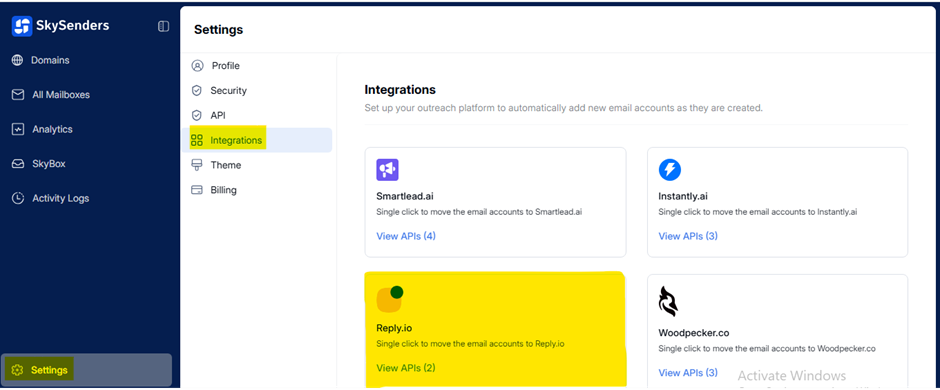
Go to Settings (bottom-left of the dashboard).
Open the Integration section.
Select Reply.io from the list.
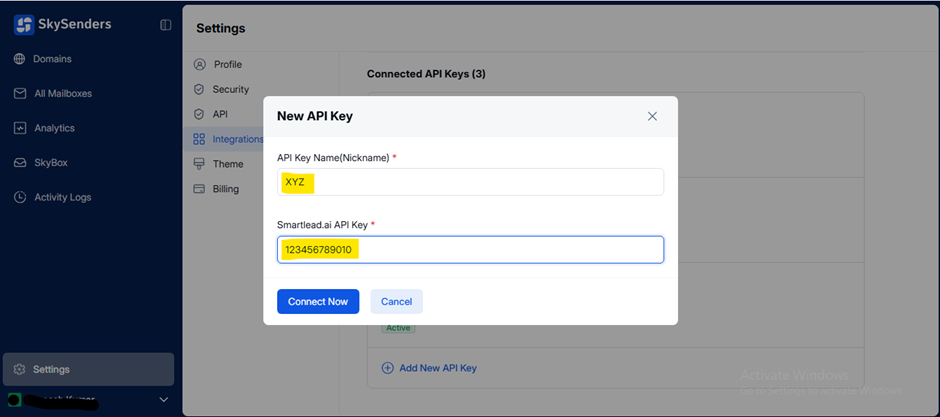
Click Add New API Key.
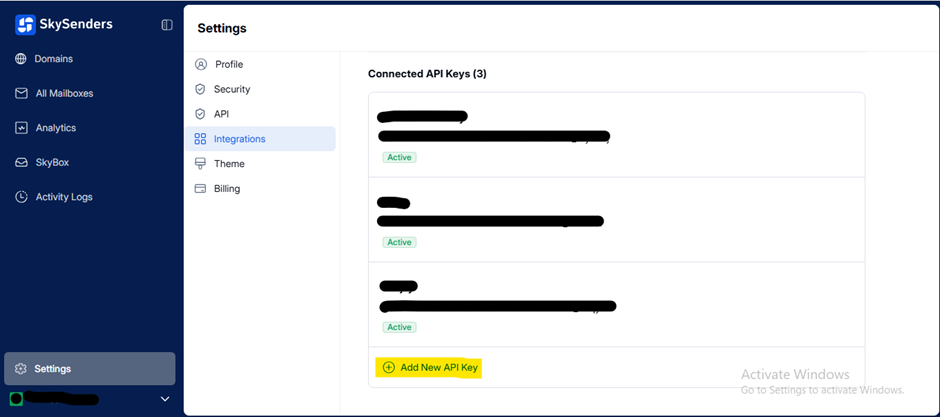
Enter the API Key Name and API Key.
Click Connect Now.
💡 Notes/Tips:
Double-check the API key and name to ensure successful integration.
📋 Description:
Push selected mailboxes from SkySenders to Reply.io using the integrated API key.
🛠 Procedure:
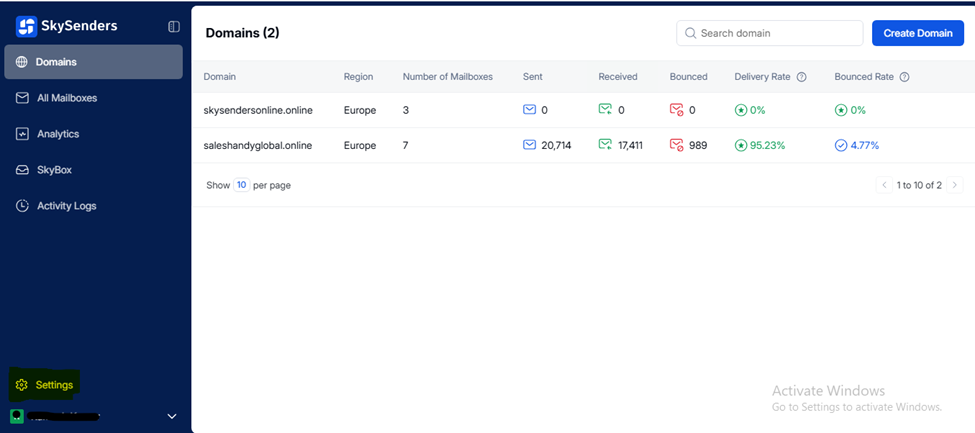
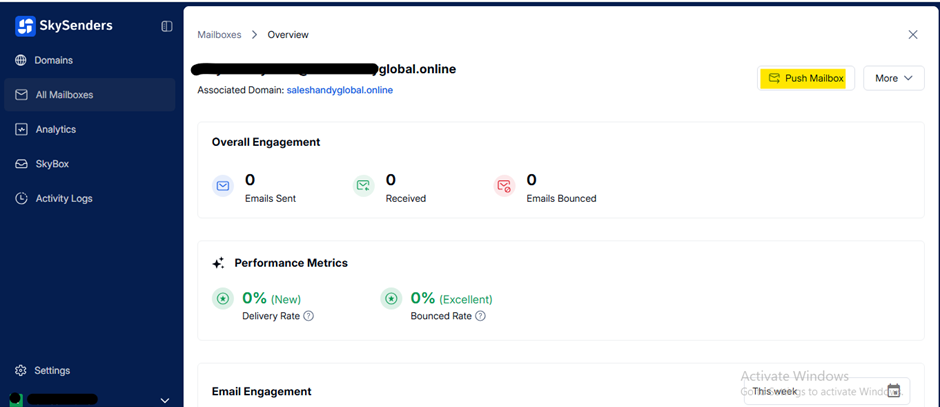
Go to the All Mailbox section in SkySenders.ai.
Select the mailbox to push.
Click Push Mailbox (top-right).
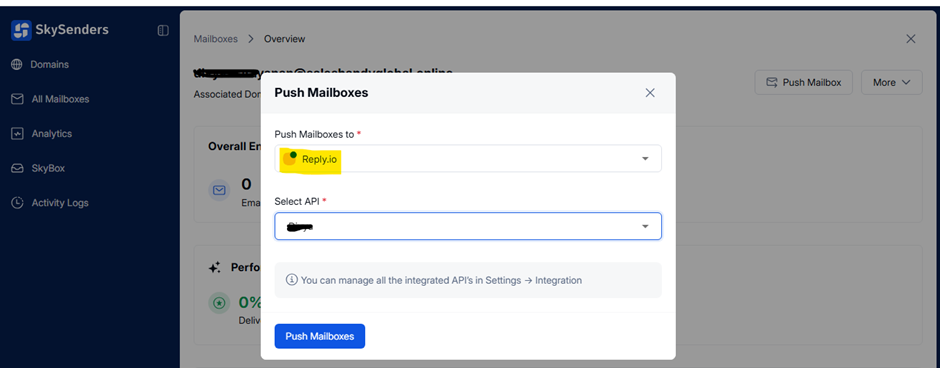
Choose Reply.io from the dropdown.
Select the correct API Key.
Click Push Mailboxes.
💡 Notes/Tips:
Confirm mailbox details before pushing to avoid errors.
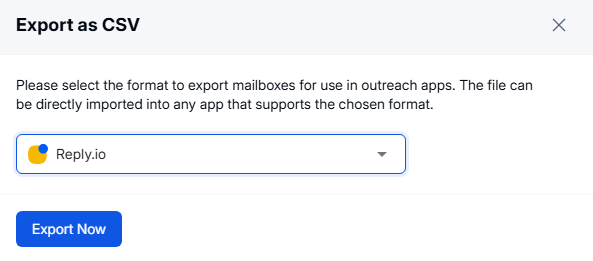
Export mailbox data as a CSV file from SkySenders for bulk import into Reply.io.
🛠 Procedure:
Login to SkySenders: https://app.skysenders.ai/login
Click on the Domain tab (top-left).
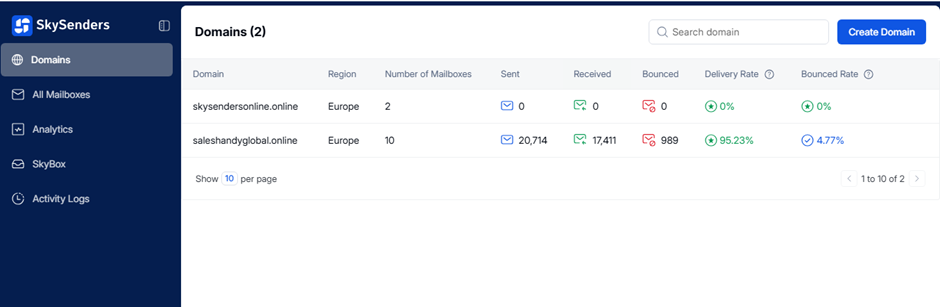
Select the domain to export.
Click Export CSV (top-right).
Select Reply.io as the export type.
Click Export Now to download the file.
💡 Notes/Tips:
Check the CSV format and ensure all fields are populated correctly.
Import multiple mailboxes into Reply.io using a structured CSV file.
🛠 Procedure:
Login to Reply.io.
Click Profile (top-right) → Settings → Email Accounts.
Click New Email Account (top-right).
Select Import from CSV.
Upload the exported CSV file.

✅ Confirmation:
Successfully imported mailboxes will be listed under Mailboxes.
Manually configure mailboxes using SMTP and IMAP settings in Reply.io.
🛠 Procedure:
Login to Reply.io.
Click Profile → Settings → Email Accounts.
Click New Email Account (top-right).
Select Create Manually.

Choose your Email Provider.
Enter SMTP & IMAP details, click Save.
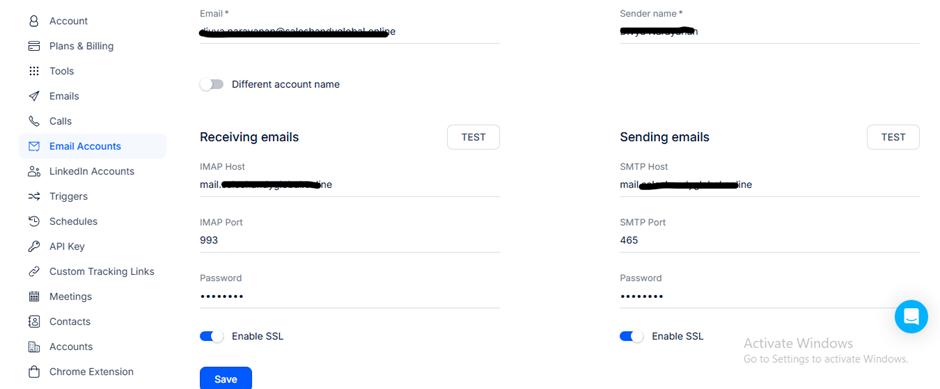
Go to Safety tab and complete required fields.
Go to Signature:
Add or paste your email signature.
Go to Opt-out Page Text:
Enter friendly opt-out text for compliance.
Click Save.
💡 Notes/Tips:
⚠ Avoid duplicate pushes: Check if the mailbox is already added.
🔔 Error notifications may show if attempting to re-add an existing mailbox.
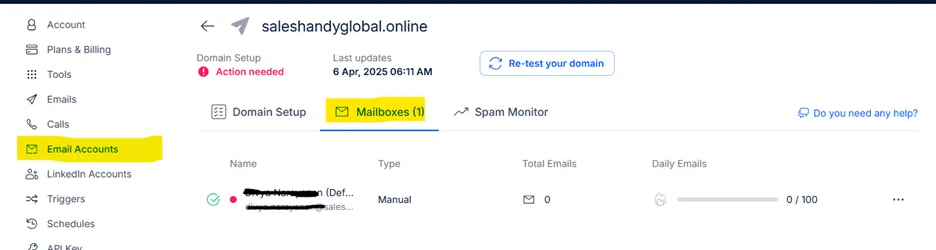
Validate whether mailboxes were successfully added in Reply.io.
🛠 Procedure:
Login to the Reply.io application.
Go to Email Accounts (left sidebar).
Check the Mailboxes section:
✅ Mailbox visible = push successful
❌ Mailbox not listed = push failed
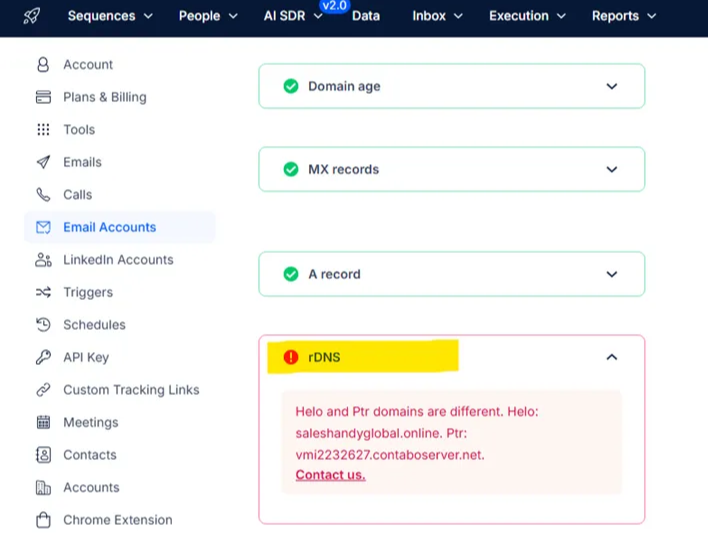
Users may encounter a "DNS Significant" error under the Domain Setup section, indicating that action is required.
This behaviour is a known limitation with Reply.io. It is not a technical issue on their end, but rather a result of their use of an older DNS verification method, which can sometimes conflict with newer domain standards.
If there are any concerns regarding compatibility or the evolving DNS verification landscape, we recommend either:
Considering alternative platforms that support modern DNS verification methods, or
Reaching out to Reply.io's support team to discuss potential improvements or workarounds.
